


Think pricing is just a boring number at the bottom of a spreadsheet? In dropshipping, it deserves as much attention as your suppliers, shipping, and branding. The right pricing strategies help protect your profits while giving shoppers a reason to choose your store.
Knowing how to price your products starts with understanding what each sale actually costs you. Supplier prices, shipping, transaction fees, and advertising can eat into what initially looks like a healthy profit. A sale should leave you with money, not just a notification.
In this guide, I’ll walk you through a simple pricing calculation, then break down 10 dropshipping pricing strategies and when to use them. You’ll also learn which metrics to track, how to leave room for discounts and returns, and where AutoDS can help automate your pricing.
Calculate your full costs first: Include the product, shipping, fees, advertising, and overhead before setting a price.
Markup isn’t profit margin: Markup is based on cost; margin is based on revenue.
Choose strategies that fit your offer: Start with cost-plus, then test bundles, value-based pricing, or other approaches.
Know your break-even price: Leave room for profit, discounts, and unexpected return costs.
Automate updates, review results: AutoDS can adjust prices based on sales performance, but actual profitability still needs your attention.
How to Calculate Your Dropshipping Price (Step by Step)
Before choosing a pricing strategy, work out what each sale needs to cover. I’ll use one example throughout: a t-shirt that costs $12 from your supplier. All costs and fees below are illustrative; replace them with your own numbers.
1. Add your product and shipping costs
Your supplier charges $12 for the t-shirt and $4 to ship it to your customer. That brings your starting cost to $16 per order.
Offering free shipping? You still pay that $4, so your selling price needs to cover it.
2. Account for transaction fees
Let’s assume your payment processing fee is 3% of the selling price + $0.30. The $0.30 is straightforward, but the percentage depends on the price you eventually charge.
For now, keep those components separate: your known costs are $16.30, with another 3% of the selling price still to cover. Check your actual platform and payment provider fees, including any additional transaction charges.
3. Allocate overhead and advertising costs
Monthly subscriptions and other fixed expenses need to be covered, too. Suppose your store costs $100 per month to run and you expect 50 orders. That allocates $2 in overhead per order.
Then assume you spend an average of $5 on advertising to generate each order. Your t-shirt’s costs now total:
$12 + $4 + $0.30 + $2 + $5 = $23.30, plus the 3% processing fee.
💰 Financial Tip: Use realistic sales estimates when allocating overhead. If you get fewer orders than expected, each order needs to cover a larger share of those monthly costs.
4. Choose your target margin
For this example, let’s aim to keep 20% of the selling price after the costs listed above. That’s an illustrative target, not a universal recommendation.
A 20% margin is different from adding a 20% markup to your costs. To calculate a price that covers both your target margin and the percentage fee, use:
Selling price = Costs per order ÷ (1 − Fee rate − Target margin)
For our t-shirt:
$23.30 ÷ (1 − 0.03 − 0.20) = $30.26, rounded to the nearest cent.
5. Check the final price against your market
At $30.26, the percentage processing fee is approximately $0.91. After subtracting that and the $23.30 in other costs, you retain about $6.05 per order, before taxes and any expenses not included here, such as returns.
Now compare that price with similar t-shirts, considering fabric, design, delivery, and store credibility. If shoppers won’t pay it, revisit your sourcing costs, advertising spend, or offer. Treat your calculated price as a starting point to test, not proof that the product will sell.
Types of Dropshipping Pricing Strategies
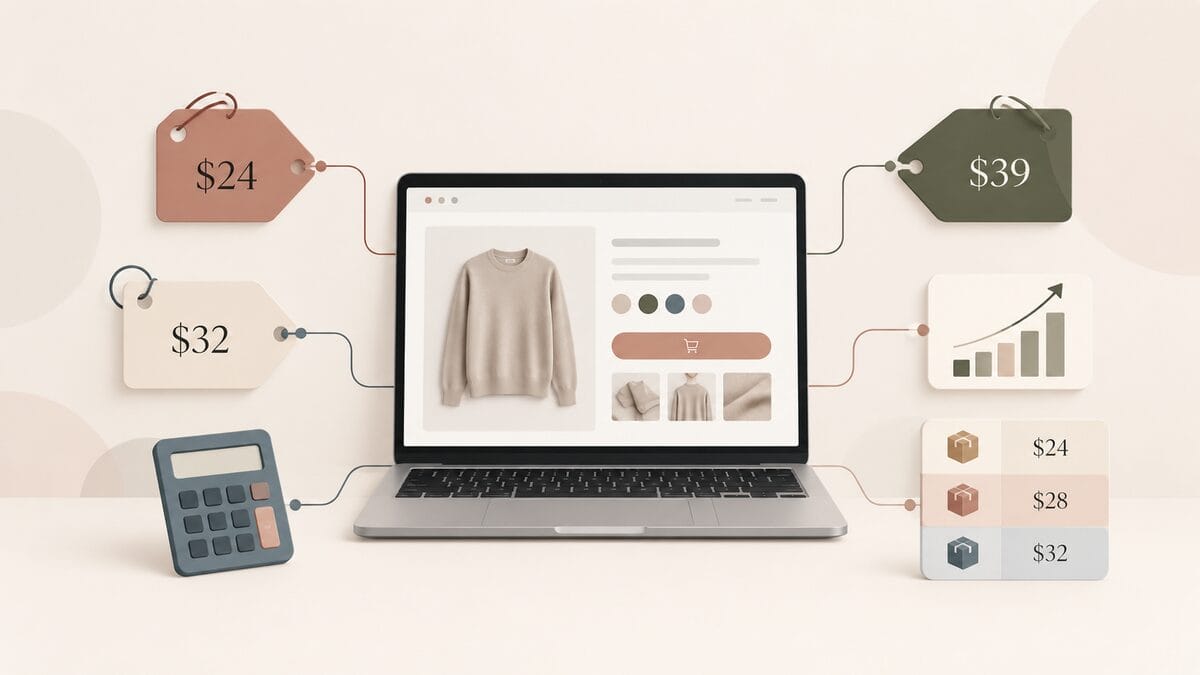
Once you know what your price needs to cover, you can decide how to position it. These 10 pricing strategies give you different ways to balance costs, customer expectations, and competition. You can also combine them: for example, using cost-plus to set a baseline and bundle pricing to create an attractive offer.
Fixed Markup on Cost
This is one of the simplest pricing strategies in dropshipping: add a consistent percentage or dollar amount to your supplier’s product cost.
Using our $12 t-shirt, a 50% markup gives you a selling price of $18:
$12 × 1.50 = $18
It’s quick, easy to automate, and useful for catalogs with similar product costs and expenses. But there’s a catch: markup doesn’t equal take-home profit. That $6 difference still needs to cover shipping, fees, advertising, and other expenses. In our earlier example, $18 wouldn’t cover them.
Why use it?
- Simple to set up: Apply the same rule across similar products.
- Easy to manage: Recalculate prices when supplier costs change.
- Consistent starting point: Build your pricing around a clear, repeatable rule.
I’d use fixed markup as a starting point for a fairly uniform catalog, then check that each price covers all costs. A consistent markup only works when the expenses behind those products make sense, too.
Tiered Markup on Cost
Got a diverse catalog, from inexpensive accessories to higher-ticket products? Adjust your markup by cost range instead of applying the same percentage to everything.
For example, you might apply a 100% markup to a $5 product and a 30% markup to a $100 item. Their selling prices would be $10 and $130, respectively, before checking whether those prices cover your other expenses.
Why use it?
- More room on cheaper items: A higher percentage can help cover per-order expenses.
- Flexibility on expensive products: A lower percentage can keep the final price competitive.
- Repeatable pricing rules: Define cost brackets and apply a markup to each.
This approach suits stores with a wide range of product costs, but check the boundaries between tiers. An abrupt drop in markup could accidentally price a more expensive product below a cheaper one.
Cost-Plus Pricing
Cost-plus pricing starts with the full cost of making a sale, then adds a markup. Fixed and tiered markups are forms of cost-plus pricing; the practical distinction here is that you include shipping, fees, and allocated expenses instead of applying a percentage only to the supplier’s price.
The basic formula is Selling price = Total cost × (1 + Markup rate). For example, if your fully calculated cost per order is $22, adding a 40% markup gives you a $30.80 selling price. That leaves $8.80 in profit after those included costs, a margin of approximately 28.6%, not 40%.
Why use it?
- Makes expenses visible: Encourages you to account for more than the product itself.
- Gives you a clear baseline: Shows what you need to charge to cover costs and add profit.
- Works with pricing rules: Apply a consistent markup once your cost inputs are accurate.
If your fees depend on the selling price, use the percentage-fee calculation from the earlier walkthrough to avoid undercounting them. And check whether customers will pay the result: cost-plus gives you a price based on your expenses, but demand and competition still matter.
Break-Even Pricing
Break-even pricing is the price where you cover your costs with zero profit. It gives you a useful floor before deciding how much to charge or how far a discount can go.
When you pay a percentage-based transaction fee, use:
Break-even price = Costs per order excluding percentage fees ÷ (1 − Percentage fee rate)
For our t-shirt, that’s $23.30 ÷ (1 − 0.03) = $24.03, rounded up. This covers the product, shipping, processing fees, advertising, and allocated overhead included in our example. Additional costs, such as returns, would raise that floor.
In practice, build profit into your selling price using the target-margin formula from the walkthrough. I’d keep break-even handy as a reference for promotions; you want to know exactly when a “great deal” stops being great for your store.
Value-Based Pricing
With value-based pricing, you set your price around what the product is worth to your customer. Your costs still matter, but they don’t determine the entire price.
Think about our t-shirt: an original design aimed at a specific community could command more than a generic tee with the same supplier cost. That extra value needs to come from something shoppers actually care about, such as the design, verified fabric quality, or a better fit. Calling it “premium” won’t do the work.
Why use it?
- Room for higher margins: Customers may pay more for meaningful differences.
- Less reliance on price matching: Gives shoppers reasons to choose beyond the lowest price.
- A focus on your audience: Connects your offer to what your customers value.
This approach suits niche stores and differentiated products. Customer feedback and price tests help you understand what shoppers will actually pay, rather than assuming a polished storefront automatically justifies a higher price.
📢 Marketing Tip: Show the value you’re charging for. Close-up sample photos, useful demonstrations, and specific product details give shoppers more to work with than a string of fancy adjectives.
Psychological Pricing
Psychological pricing considers how shoppers perceive your price, including how it’s displayed and which alternatives appear beside it. Here are four tactics you can test.
Charm pricing
Prices ending in .99 or .95 can make an offer feel more affordable. For example, you might test our t-shirt at $29.99 instead of $30. Just check the math first: dropping below the previously calculated $30.26 also puts you slightly below that example’s target margin.
Price anchoring
An anchor gives shoppers a reference point for comparison. Displaying a standard tee beside a more expensive embroidered version can make the standard option feel more affordable. If you show a crossed-out previous price, it should reflect a genuine price history, not an inflated number created to manufacture a discount.
Decoy pricing
Decoy pricing introduces an option that makes another offer look more attractive. Imagine one tee for $30, two for $58, or three for $60. The two-pack acts as the decoy, making the three-pack look like a better value by comparison. Calculate each bundle’s costs separately: advertising and fixed transaction fees may apply once per order, while product and shipping costs can increase with each item.
Free-plus pricing
Often called free-plus-shipping, this tactic advertises the product as free while the customer pays shipping and handling. Check whether the total charge covers costs, and make it clear upfront. If the offer only works with an inflated shipping charge or surprise fees, I’d skip it. Disappointed shoppers are an expensive acquisition strategy.
These tactics can influence purchasing decisions, but test profit alongside conversion rate. More orders won’t help much if each one leaves you with less than you need.
Bundle Pricing
Bundle pricing means selling complementary products together for less than their combined individual prices. Think a beach bag with a towel, a matching workout set, or a t-shirt paired with a cap.
The appeal is simple: shoppers get a convenient combination and a visible saving, while you have an opportunity to increase average order value. The products should make sense together, though, adding a random phone case to a yoga kit probably needs more explanation than it’s worth.
Why use it?
- Larger orders: Encourage customers to buy related items together.
- Easier shopping: Offer a ready-made kit, gift, or outfit.
- More revenue per acquisition: Sell multiple products from one customer’s visit.
Before setting the discount, calculate the bundle’s full cost, including any separate shipping charges. Products from different suppliers may arrive in separate parcels, so don’t assume bundling saves on fulfillment. I’d start with one relevant pairing and track profit per order alongside sales.
Competitive Pricing
Competitive pricing means using similar offers as a reference when setting your own prices. Shoppers can compare stores in seconds, so it helps to know where your offer sits, and what customers get for the difference.
Compare the total delivered price, along with product quality, shipping speed, and return conditions. A $25 item with $7 shipping costs the customer more than a $30 offer with shipping included.
You can approach that comparison in a few ways:
- Price matching: Set your price at the same level as a comparable competitor’s offer, provided it still covers your costs and leaves enough profit.
- Pricing below competitors: Offer a lower price when your costs support it. Set a minimum profitable price before making cuts.
- Pricing above competitors: Charge more when you offer a meaningful advantage, such as verified quality or faster delivery.
- Price skimming: Start high and gradually lower the price as early demand slows or competition grows. This is a separate strategy, but relevant when planning your market position. It works best with differentiated products; widely available items give shoppers fewer reasons to pay that initial premium.
Use competitor prices to understand the market before making your own decision. You can see their price tag, but you can’t see their supplier deal, acquisition costs, or whether they’re making money.
Penetration Pricing
Penetration pricing means launching with a low introductory price to attract customers, then raising it as your product or store gains traction. Unlike ongoing competitive pricing, the lower price is part of a planned entry strategy.
For a new store, it can give shoppers an incentive to try an unfamiliar seller. The trade-off? You earn less on those early orders, and some customers may leave when prices rise.
Why use it?
- Encourages first purchases: Gives price-conscious shoppers a reason to try your offer.
- Helps test demand: Lets you observe how customers respond at an introductory price.
- Creates opportunities for repeat sales: A good first experience may bring customers back.
Before launching, set a time limit and budget for the offer. Know whether you’re accepting a smaller profit or an actual loss, and make the introductory terms clear. I’d also test demand at your intended regular price before scaling. Strong sales during a discount don’t prove shoppers will pay more later.
Manufacturer Suggested Retail Price (MSRP)
MSRP is the retail price a manufacturer recommends for its product. Some dropshippers use it as a starting point because it provides a ready-made reference, especially for branded products sold by multiple retailers.
But that recommendation doesn’t account for your store’s specific costs or what shoppers currently pay elsewhere. A product with a $50 MSRP might regularly sell for $35, leaving you overpriced if you simply copy the suggested figure.
Compare MSRP with actual market prices, then check it against your break-even price and profit target. It’s a useful reference when available, but it shouldn’t replace your own calculation.
Key Pricing Formulas & Metrics to Track
You don’t need a spreadsheet with 40 tabs to make better pricing decisions. Start with a small group of products, keeping markup and margin separate: markup is calculated on cost; margin is calculated on revenue.
| Formula or metric | How to calculate it | What it tells you |
|---|---|---|
| Cost-plus price | Cost base × (1 + Markup rate) | Your selling price after adding a markup to your defined costs. |
| Break-even price | Costs per order excluding percentage fees ÷ (1 − Percentage fee rate) | The price that covers your modeled costs, leaving zero profit. |
| Price for a target margin | Costs per order excluding percentage fees ÷ (1 − Percentage fee rate − Target margin) | The price needed to retain your target margin after the included costs. |
| Gross margin (%) | (Revenue − COGS) ÷ Revenue × 100 | The share of revenue remaining after the cost of goods sold, before other business expenses. |
| Cost per acquisition (CPA) | Ad spend ÷ Orders attributed to those ads | How much advertising you spend to generate an order. |
For percentage-based formulas, use decimals in the calculation: 3% becomes 0.03. Include fixed transaction charges and allocated overhead in your per-order costs, and use a consistent definition of COGS when tracking gross margin.
Using our t-shirt example, the break-even price is $23.30 ÷ 0.97 = $24.03, rounded up. Charging $30.26 instead leaves approximately 20% after the costs we included. That’s different from gross margin because our calculation also deducts advertising, processing fees, and allocated overhead.
What’s a Good Profit Margin for Dropshipping?
A good dropshipping margin leaves enough money after expenses to support your business and absorb unexpected costs. For a rough reference, AutoDS’s profit margin guide suggests a 10–30% net margin target. Treat that as planning guidance, not a measured industry average or a promise of what your store will earn.
Before comparing percentages, check which expenses have been deducted:
- Gross margin: Revenue remaining after COGS, before expenses such as advertising and subscriptions.
- Net margin: Revenue remaining after all expenses, including fees, advertising, overhead, and applicable taxes.
A gross margin above 50% can leave useful room for operating expenses, but it doesn’t guarantee strong net profit. Keeping half your revenue after all expenses would be a much stronger result, and shouldn’t be your default assumption.
Your niche, supplier costs, return rate, and reliance on paid ads all affect what’s achievable. I’d focus on a margin you can maintain at a price customers will actually pay, then track both the percentage and the dollars you keep per order.
How to Calculate Your Dropshipping Profit
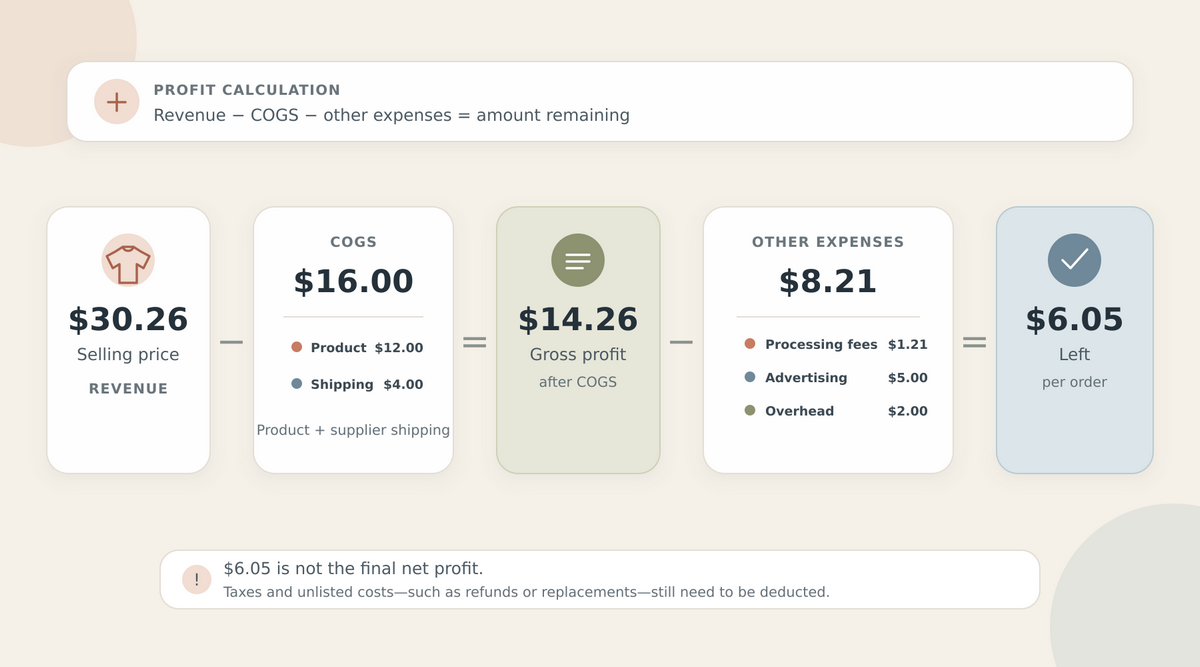
Your selling price tells you what customers pay. Your profit tells you what remains after costs. Start with gross profit, then subtract the remaining expenses to see the fuller picture:
- Gross profit = Revenue − Cost of goods sold (COGS)
- Net profit = Revenue − COGS − All other expenses
Using our t-shirt’s $30.26 selling price, and counting the $12 product plus $4 supplier shipping as COGS, gross profit is $14.26 per order.
Subtract approximately $1.21 in processing fees, $5 in advertising, and $2 in allocated overhead, and you have about $6.05 left. That’s profit before taxes and any costs we haven’t included, such as refunds or replacements, not final net profit.
For your monthly calculation, use actual revenue and expenses rather than estimates. Deduct refunds from revenue and account for any unrecovered costs, without counting the same expense twice.
Dropshipping Pricing Tips to Keep in Mind
Before you publish those prices, give your numbers a final check. These small habits can help you avoid expensive surprises:
- Budget for returns and refunds. Use your actual return history when available, including return shipping, replacements, and fees you don’t recover.
- Make larger orders worthwhile. Test complementary bundles or a free-shipping threshold, then check whether the extra revenue outweighs the added costs.
- Set a discount floor. Calculate what remains after the promotion, including any coupon codes customers can stack.
- Keep urgency honest. Use real offer deadlines or verified stock limits. A countdown that resets every morning gives shoppers a reason to doubt you.
- Check your own costs first. A competitor’s price might work with their supplier deal and ad budget, but leave you losing money.
- Test one change at a time. Keep the product page and offer consistent where possible, so you can better judge the effect of a price change.
- Track profit alongside conversions. More sales aren’t automatically better if discounts or acquisition costs eat the extra income.
💡 Pro Tip: Before scaling a product, recalculate its profit with a higher advertising cost or supplier price. If a small increase wipes out your earnings, give yourself more breathing room.
Challenges in Manual Pricing Management
Updating prices manually might feel manageable with a handful of products. But as your catalog grows, keeping every price accurate takes more work. Suddenly, you’re spending your afternoon switching between supplier pages, spreadsheets, and your store dashboard.
Three challenges tend to show up:
- Time-consuming updates: Every supplier cost change means checking the affected listings, recalculating prices, and applying the changes. That leaves less time for product research, marketing, and customer service.
- Easy-to-miss mistakes: A misplaced decimal, an outdated shipping cost, or a formula copied into the wrong row can leave you overcharging shoppers or selling below your intended margin.
- Delayed reactions: If a supplier raises a price before you notice, orders may keep coming in at a price based on yesterday’s costs. Seasonal shifts and changes in demand also require attention.
Manual pricing can still work for a small, stable catalog. Once routine updates start slipping through, though, automation becomes worth considering, with clear rules and regular checks to make sure those rules still fit your business.
Automatic Dropship Price Optimization
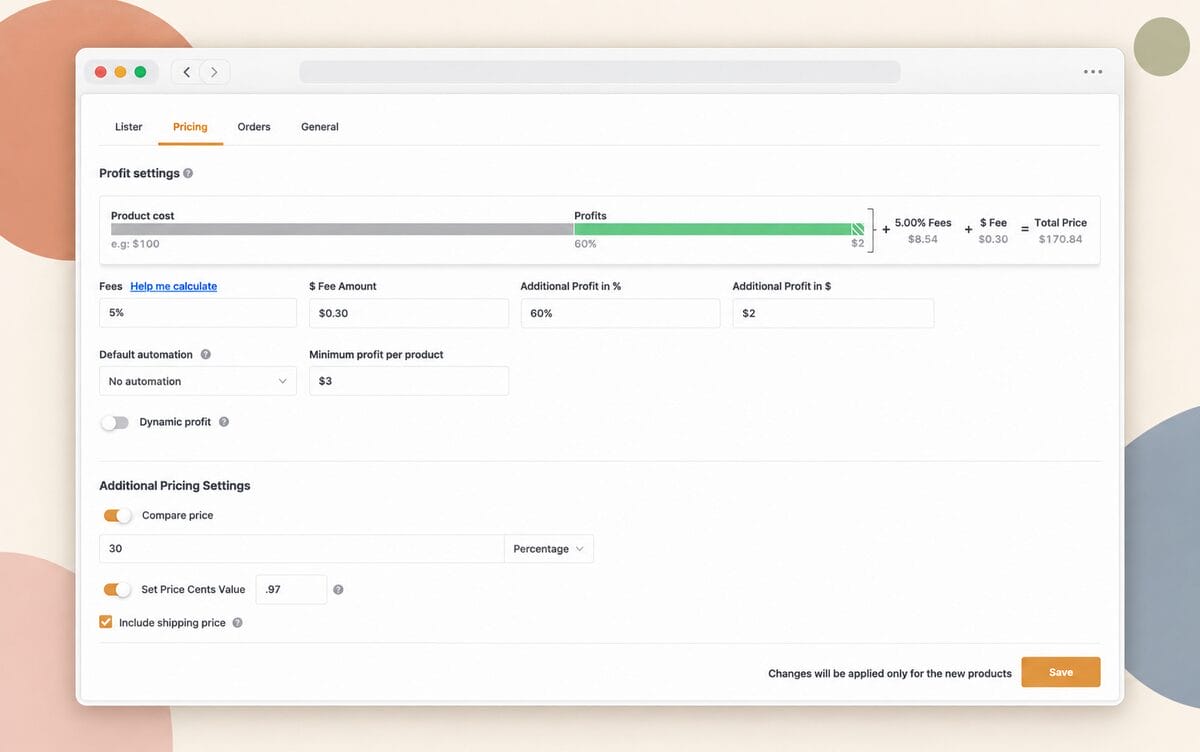
Once you’ve worked out your costs and pricing rules, you can automate some routine adjustments. AutoDS’s automatic price optimization lets you raise or lower prices based on product sales performance and the parameters you set.
Here’s how you can use it:
- Adjust prices on bestsellers: Set the number of sales a product should reach before its price increases automatically.
- Reduce prices on slow sellers: Configure price decreases for products that aren’t selling well, while keeping your costs in mind.
- Run different rules: Create multiple automations for different products and scenarios instead of treating your whole catalog the same way.
For example, you could configure a price increase after a t-shirt reaches a chosen sales threshold. That gives you a way to test a higher price as orders come in, without editing the listing after each milestone.
Performance-based optimization serves a different purpose from supplier price monitoring: one responds to sales performance, while the other tracks supplier cost changes. Your rules still need accurate cost inputs, including expenses such as advertising and returns.
I’d start with a small group of products and review the results before expanding. Automation can reduce repetitive work, but profit per order remains your reality check.
Frequently Asked Questions
What is a good profit margin for dropshipping?
AutoDS’s profit margin guide suggests a 10–30% net margin target as a rough planning reference, not a guaranteed industry average. What’s achievable depends on your niche, supplier costs, advertising, and returns. Always distinguish gross margin, which deducts COGS, from net margin, which accounts for all expenses.
Which dropshipping pricing strategy is best for beginners?
Cost-plus pricing is a practical starting point because it makes you calculate your costs before adding profit. Include shipping, fees, advertising, and allocated overhead, then compare the resulting price with similar offers. This gives you a clear baseline to test and adjust.
How do I calculate the break-even price for a product?
Divide your per-order costs, excluding percentage-based fees, by one minus the percentage fee rate. For example, $23.30 in costs with a 3% transaction fee gives you $23.30 ÷ 0.97 = $24.03, rounded up. This only covers the expenses included in your calculation.
Should I match my competitors’ prices or price higher?
Match competitors when the offers are comparable and the price still supports your profit target. A higher price can make sense if you offer a meaningful advantage, such as better quality or faster delivery. Compare total delivered prices and avoid matching an offer that would leave you losing money.
How often should I update my dropshipping prices?
Review prices whenever supplier costs, shipping charges, fees, or acquisition costs change materially. A weekly review is a useful starting routine, with closer monitoring for volatile products. You don’t need to change prices at every review—adjust them when costs or performance give you a reason.
Can I automate my dropshipping pricing?
Yes. AutoDS’s automatic price optimization lets you configure price increases and decreases based on sales performance. You choose the rules and parameters, then review their results. Automation reduces manual updates, but you still need to account for costs and check actual profitability.
Is MSRP a reliable price to use for dropshipping?
MSRP is a reference point, not proof that customers will pay that amount. It may differ from current market prices and doesn’t account for your particular expenses. Compare it with actual competing offers and your own costs before using it.
How do returns and refunds affect my pricing strategy?
Returns and refunds can reduce revenue while leaving you with unrecovered shipping, advertising, processing, or replacement costs. Include an allowance based on your return history when planning prices. When reviewing actual profit, deduct refunds from revenue and record unrecovered expenses without counting the same loss twice.
Conclusion
The best pricing strategies start with knowing what each sale actually leaves you. Once you understand your costs, you can choose an approach that fits your products, test customer response, and adjust without guessing.
Start with one product: calculate its break-even price, set a profit target, and compare your offer with the market. Track what you keep, not just what you sell. A busy store shouldn’t need a second job to fund it.
When you’re ready to reduce manual updates, you can try AutoDS for $1 and set up pricing rules around your product performance. Let automation handle the repetitive adjustments while you keep an eye on the results.
Want to keep building a stronger store? These guides are a good next stop:
- How To Calculate Your Dropshipping Price
- Types Of Dropshipping Pricing Strategies
- Key Pricing Formulas & Metrics To Track
- What's A Good Profit Margin?
- How To Calculate Your Dropshipping Profit
- Dropshipping Pricing Tips To Keep In Mind
- Challenges In Manual Pricing Management
- Automatic Dropship Price Optimization
- FAQ
- Conclusion